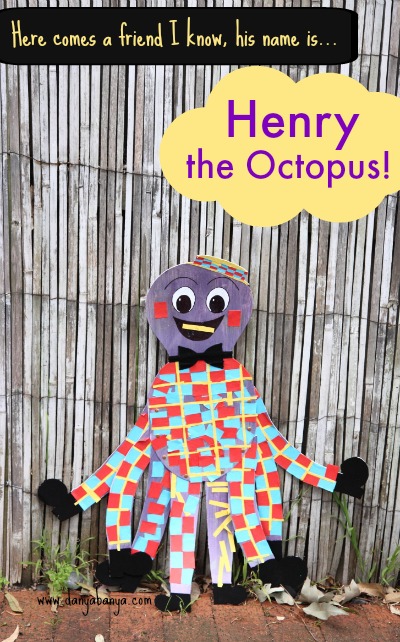
Opps, I haven’t had a chance to tell you how the rest of Bee’s Wiggles birthday party went. I already told you about the Dorothy the Dinosaur egg carton rose and paper plate rose craft ideas. Here’s a third craft idea that I thought would be fun for a bunch of kids to do together – stick the clothes on Henry the Octopus!
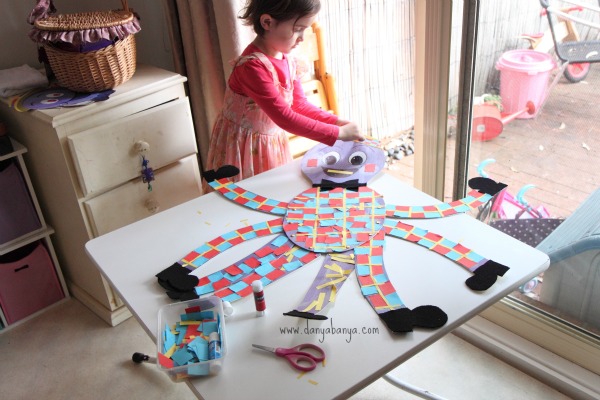
So I made this cute, but very naked Henry the Octopus! What a rudie nudie!
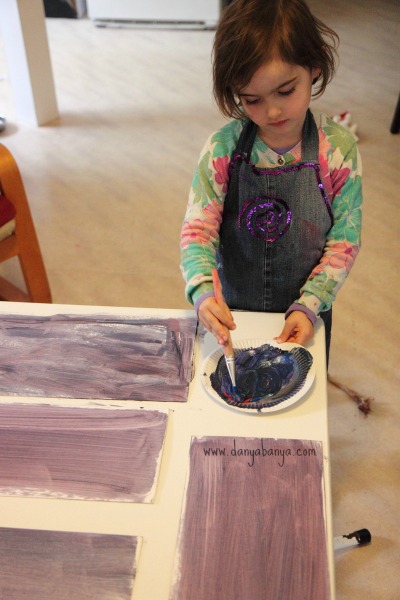
Actually, I can’t take ALL the credit. JJ did help paint. After all, purple is one of her favourite colours…
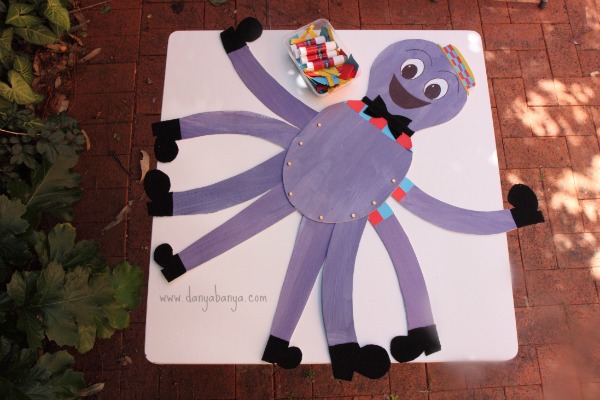
Henry’s made from sturdy recycled cardboard. I cut out and put together all the pieces over the next couple of nights. The bowtie and shoes are glued on black upcycled fabric. The yellow part of the hat is repurposed fabric too. The facial expressions are drawn on with black permanent marker and liquid paper. The arms (or legs) are attached with paper fasteners (which are sometimes called split pins). The ‘clothes’ are just red, blue and yellow pieces of paper that have been cut into rough squares or rectangles for the kids to glue on with glue sticks.
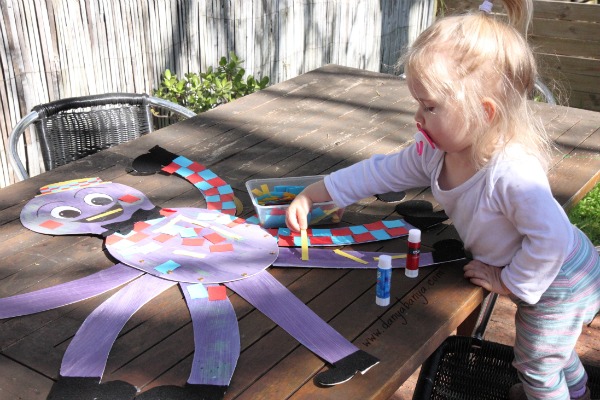
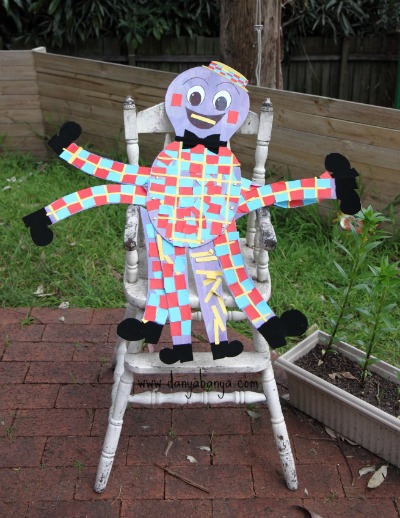
Before the party, I stuck a few of the coloured squares on to give the kids the idea, and then left them to decorate Henry however they wanted. Apparently they thought he needed some rosey cheeks and a yellow tongue. After the party, Henry still had a few bare arms, so the kids and I finished dressing him over the next few days.
Once Henry was fully clothed, he became a fun homemade toy! He’s light weight enough that he’s easy to carry around. The kids especially like the moveable arms and legs.
I thought he could double as our ”elf on the shelf’ this Christmas, but I have a feeling Henry might be hard to hide. 🙂
I got the idea for these egg carton roses when I saw something similar in a beautiful craft display at our local library. Their version was a little more intricate, but it got me thinking about the huge pile of egg cartons in our recycling stash. I’m on a bit of a rose roll after making paper plate roses for Bee’s upcoming Wiggles Party… Maybe they could go together with these egg carton roses to be both party craft and party decorations??
So I set about to make some, and was surprised at how quick and easy they were. Besides the drying times, I reckon I could make half a dozen of these roses in under ten minutes.
To make some, you’ll need:
an egg carton (or egg box if you’re British)
paint and paint brush (optional)
craft glue or PVA glue
scissors
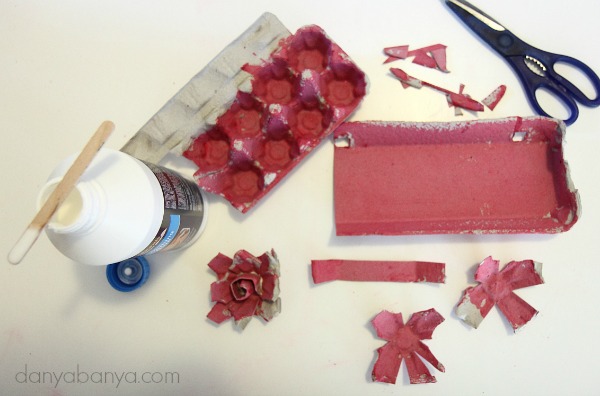
Start by painting an egg carton, on all sides, and let it dry. This step is super fun for both toddlers and preschoolers to do, especially as the results don’t need to be perfect. In fact, lots of little paint gaps will just add character to your rose. (Or, if you’d prefer plain roses, you could leave this step out altogether.)
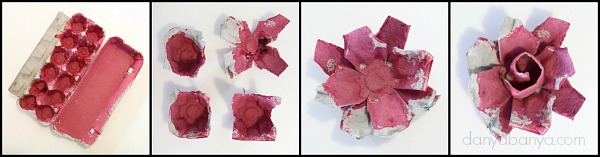
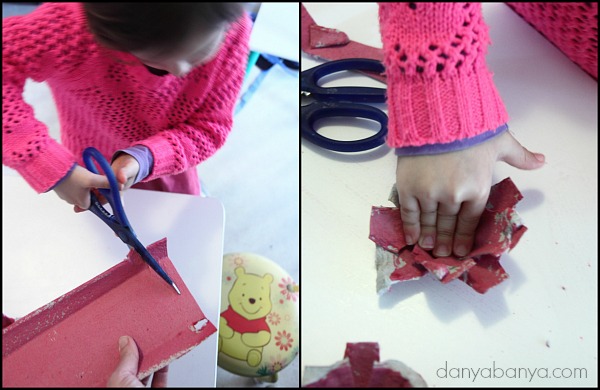
Then cut out each individual, umm, egg cup? (What do you call the little space the egg sits in? Wikipedia calls it a dimple, which seems more quaint than accurate to me…). Cutting these out is a bit tricky for little hands, and probably needs a grown up. There’ll be two pointy corners that are higher than the rest – trim these down to size.
Then make four cuts at the lowest point on each side of the egg cups, so that they can be spread out roughly flat and look like they have four petals, and cut the lid of the egg carton horizontally into roughly one inch strips. My preschooler JJ (4 years old) was able to help with this, with some assistance. The hardest bit is that she had to cut through thick cardboard, which requires greater hand strength than cutting through paper. She could do it if I held the cardboard, so that she could use both hands to squeeze the scissors, but it would probably be better suited to a slightly older age group.
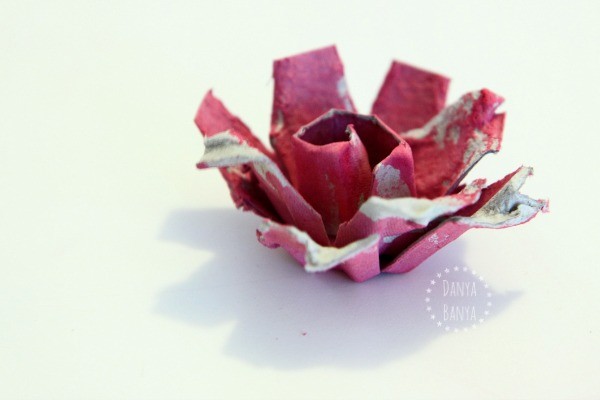
The next step is to glue two of these cut egg cups on top of one another, so that the petals underneath show through the gaps of the petals on top. Then roll up one of the horizontal strips and glue it onto the middle of the flower. Set the flower aside to dry.
And repeat!
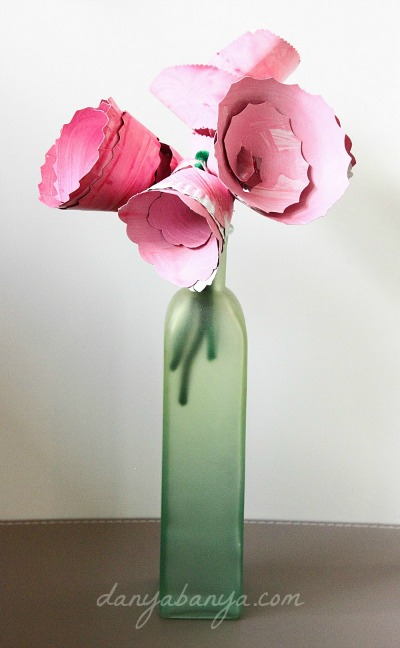
We’ve made these three so far. (The bottom one was the one that JJ helped with).
Rosey fun! I think Dorothy the Dinosaur would be proud. 🙂
I might make some more and use them as party decorations. I’m thinking about also have a stack of painted and plain egg cartons available in case any of the kids (and likely a few grown ups) are feeling a bit crafty….
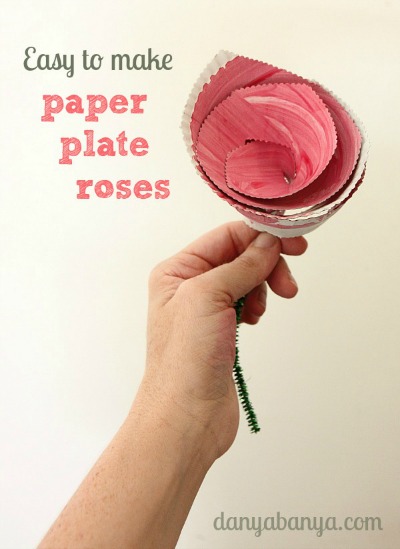
We’re planning a Wiggles theme for Bee’s second birthday in a few weeks time, so I’m crash testing some easy Wiggles inspired craft ideas that would be suitable for either toddlers or preschoolers. The first ones we tried were these Dorothy the Dinosaur paper plate roses….
You need:
paper plates
paint & paint brush (optional)
paper edger scissors (or normal scissors)
green pipe cleaner
stapler
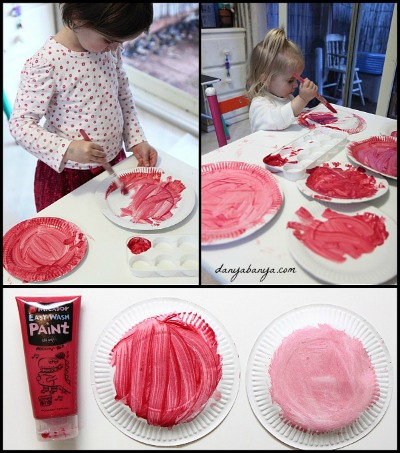
Dorothy likes everything to be rosy pink, so we started off by painting our paper plates pink. (Actually I used Micador Rockin’ Red {not sponsored}, which paints on red, but faded to pink when dried.)
Since you need to paint the front and back of each plate, we painted a bunch over two sessions. You could skip this step if you buy pre-coloured plates, but that would mean missing out on painting fun! Plus I think the streaks and white patches from dodgy toddler paint jobs add a lot of character to the roses.
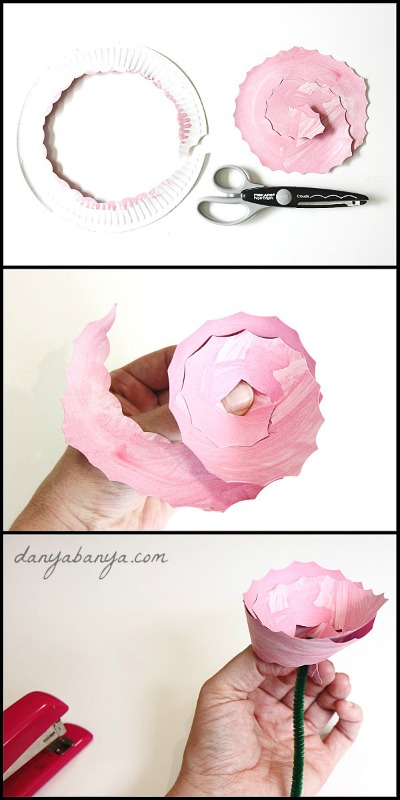
Once the plates are dry, use fancy paper edger scissors to cut off the corrugated edge of the plate, and then cut a spiral to the centre. I have a set of six Friskars paper edgers {not sponsored} that I bought a few years ago and use all the time. If you don’t have paper edgers, than normal scissors would work too.
Grab the middle piece, and then wrap the rest of the spiral around until the end meets the beginning again.
Staple the pipe cleaner to the two ends. You might want to cut the pipe cleaner in halves to make a small straight stem, or leave it whole and twist sections to make two green leaves – it’s up to you!
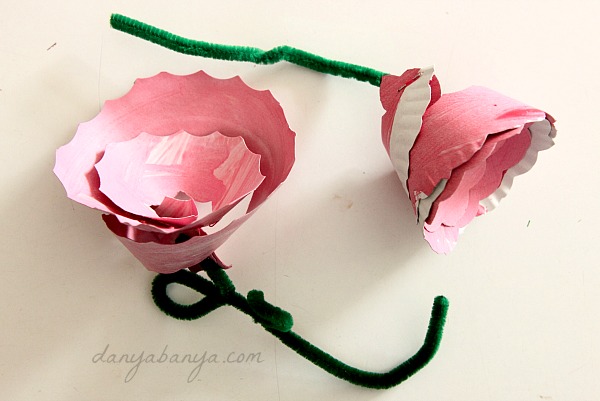
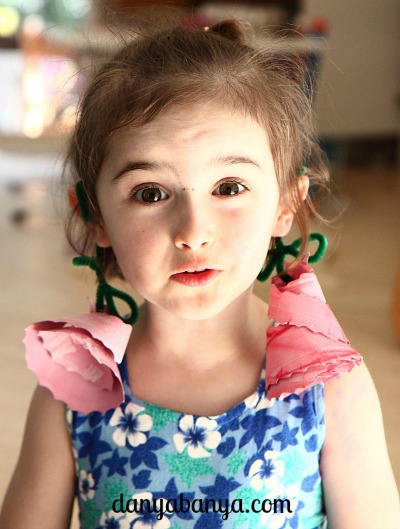
I made the one above, and JJ helped to make the rest, including this one below.
Cutting off (or trimming down at least) the corrugated edge was something JJ could do on her own. She needed help to cut spirals, but with assistance she was able to achieve a rough spiral shape. I tended to take over for the stapling bit. Working together, we were able to make a few respectable flowers, to create quite a lovely bouquet.
And so if we go back to the original question – is this a good craft for a Wiggles party?
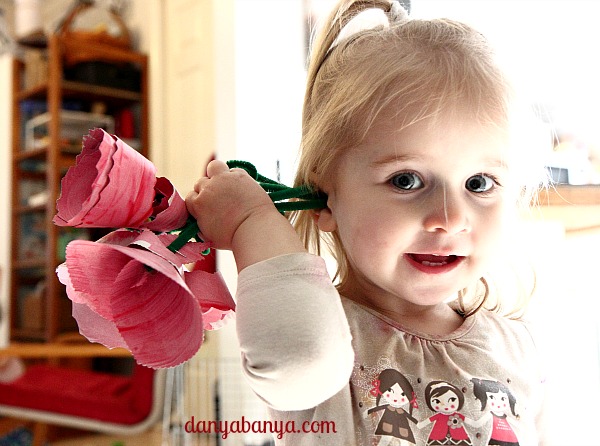
My almost two year old toddler Bee had loads of fun painting the paper plates, but the rest of the craft was a bit beyond her. She did love playing with the finished roses though!
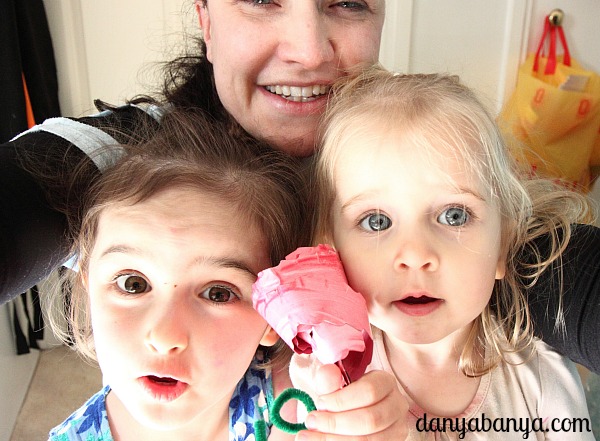
My four year old preschooler JJ had lots of fun making these roses, and was able to do most steps with assistance. There will be a few 4 and 5 year olds coming to the party with their parents, so this might be a cute activity that they could do together. I’ll probably provide the plates pre-painted however, because chances are there won’t be enough drying time to paint and create a rose flower in the one afternoon.
I have a few other Wiggles craft ideas that I’m hoping to road test in the next fortnight, so stay tuned….
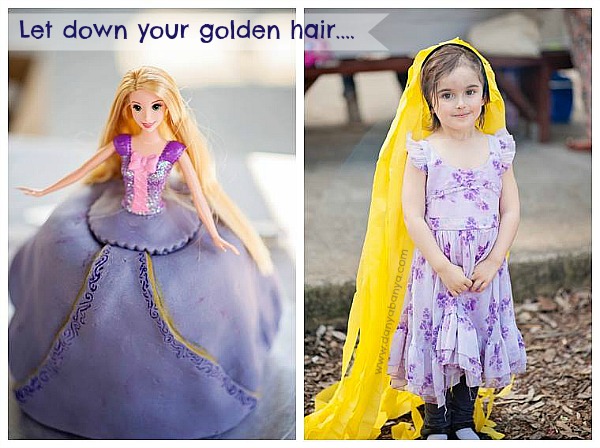
Because apparently one fourth birthday party isn’t enough, we also threw JJ a birthday party for family and close friends on the weekend. JJ asked for a Rapunzel doll cake, and of course every budding Rapunzel needs long golden hair (unless you decide to cut it all off, but that’s another story…)
Photos by Megan Webb Photography (http://www.meganwebb.com.au/)
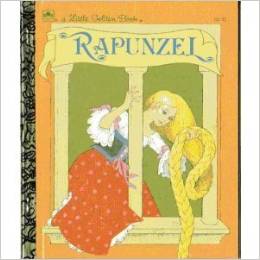
JJ fell in love with the Rapunzel story through reading (and re-reading and re-reading) our vintage My Little Golden Book version (which I’ve just seen is available on Amazon for a cruel $0.01).
In this interpretation of the story, Rapunzel’s pregnant mother is bewitched to crave Rapunzel, a plant that grew only in the sorceress’s garden. The woman agrees to give up her newborn child in exchange for Rapunzel leaves. The daughter Rapunzel grows up imprisoned in a tower, where she is one day overheard singing by a handsome prince. When the prince is caught visiting Rapunzel, he is blinded by the sorceress as punishment, and Rapunzel is banished to the most deserted place on Earth. Only years later are the pair reunited when the price blindly stumbles upon Rapunzel’s exile.
As you can imagine, I was quite surprised when JJ wistfully said one day she wished she was Rapunzel. I asked why? Surely it would have been unpleasant to grow up away from your parents, imprisoned in a tower by an evil sorceress, and to have the only other person you’ve ever met and fallen in love with blinded before being banished to exile? JJ, the eternal romantic optimist said “But she does get to marry the prince in the end.”
It’s only recently that JJ’s been introduced to the Disney’s version Tangled, with it’s significant plot shifts from the Golden Book version we knew. JJ was hooked all over again. I’m sure it must be the allure of long hair, especially as JJ’s own hair refuses to grow. But I do secretly think that Tangled’s Rapunzel has a bit of spunk. She’s a child who can entertain herself, be it through reading, writing, painting, baking, sewing, candle stick making. She’s smart, kind, charismatic and playful. She has the confidence to chase her dreams, even when she’s told she can’t.
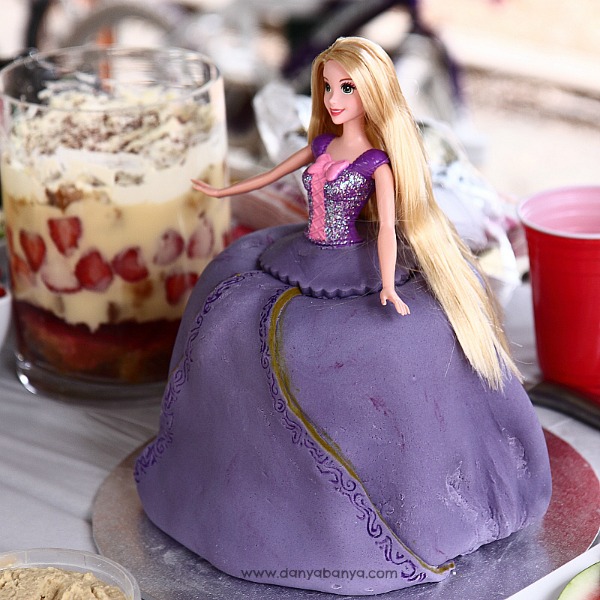
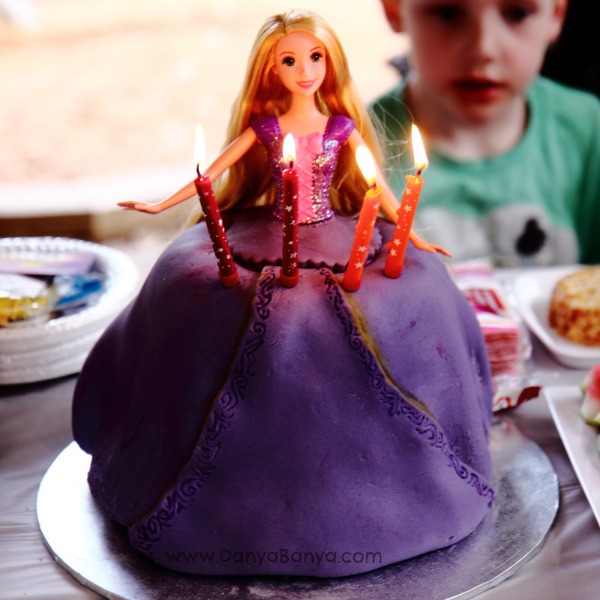
We bought JJ a Rapunzel doll that would be both a birthday present, and the centre of her Rapunzel cake. To make the skirt, I I planned to bake a Bundt butter cake. If you follow me on Instagram, you may have witnessed the highs and lows of my Bundt baking attempts. However it wasn’t until I began constructing the skirt that I realised one Bundt cake wouldn’t be enough. Rapunzel has long legs, and so she needs a big skirt! I ended up stacking one and a half Bundt cakes to bring the height up to match Rapunzel’s waistline.
I covered the skirt with butter cream icing and coloured ready to roll icing, and added a few details using edible markers. It’s not perfect, but JJ still thought it was magical.
And of course every Rapunzel loving girl needs her own Rapunzel wig of long golden hair, or in this case, a headband of Rapunzel hair extensions.
Here’s what I used and how I did it:
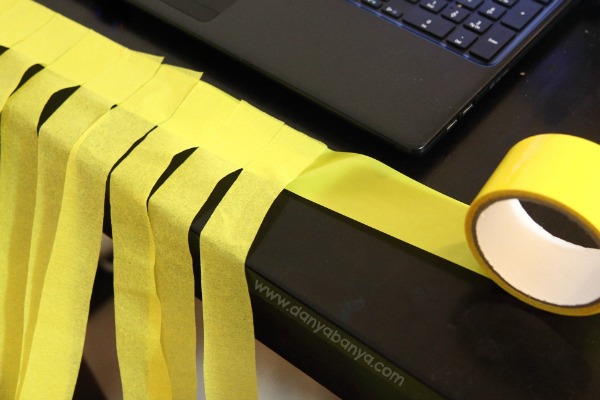
yellow packing tape (I already had this, but they were cheap as chips at $2.00 for a colourful set of 6).
yellow streamers ($1.50)
repurposed cardboard (free from an old cereal box)
PVC glue
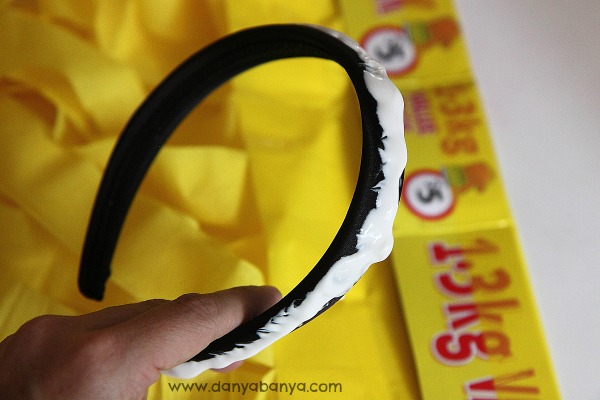
a wide fabric headband ($2.00)
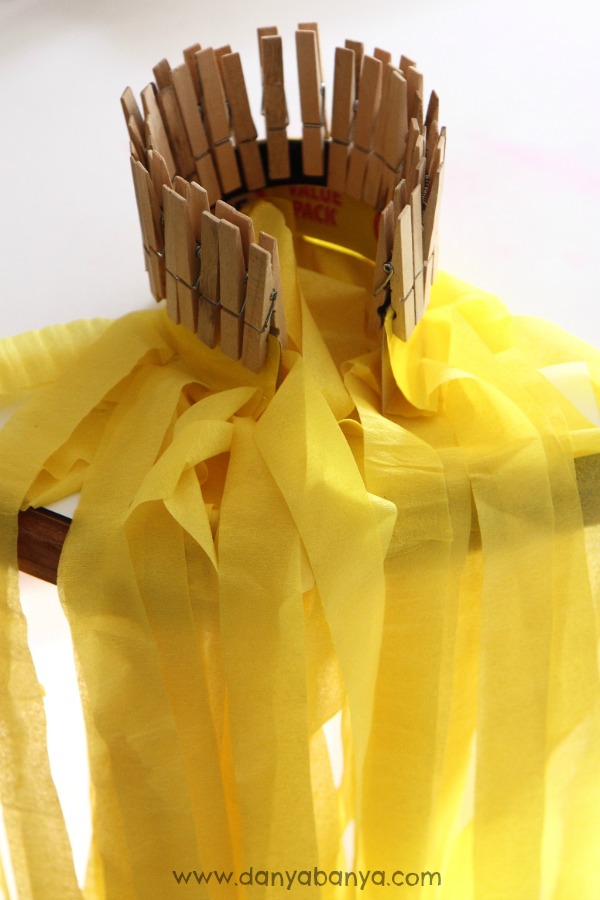
lots of pegs!
bulldog clips (optional)
I bought yellow streamers and a headband from the discount shop for $3.50, and the rest of the materials I already had on hand. I began by cutting the streamers into long strips (roughly about 2 metres long), sticking them along a section of packing tape (roughly about 40cm wide).
I continued this for three rows, overlapping the tape by about 1 cm each row, and offsetting the streamers each time. I then taped on to a piece of upcycled cereal box cardboard, and glued the whole lot to a headband using PVC glue.
Pegs held it all together while the glued dried. (Be sure not to glue the pegs to the headband in the process though!)
(One can never have enough pegs).
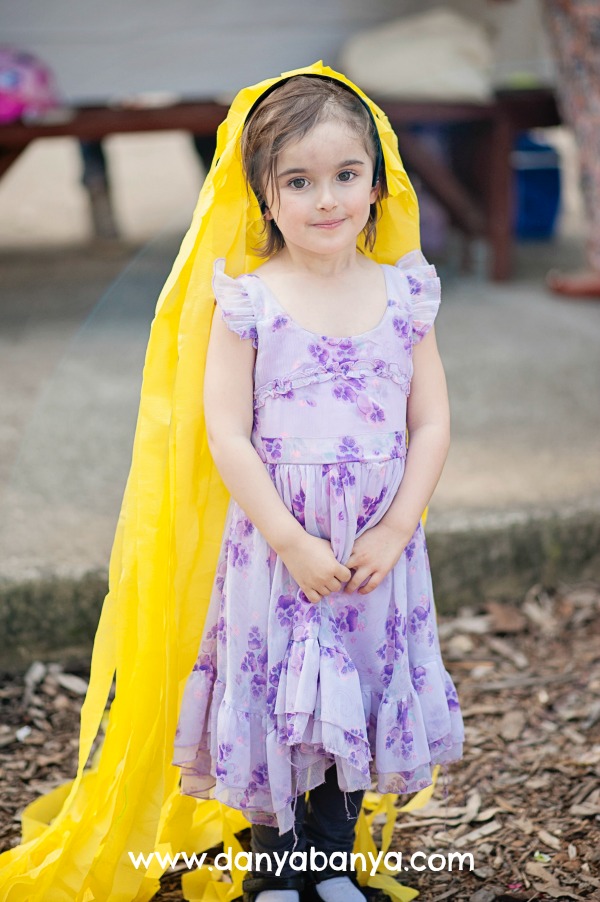
I gave JJ her new Rapunzel headband just before the first guests arrived. She put it on, and her eyelids fluttered in that way that all little girls do when they feel like they are the most beautiful being in the world. Success!
JJ ran, played, climbed and even rode her bike (with helmet) all while wearing her long golden hair. I love that it is light weight enough that she could feel the length flowing behind her without it restricting her movements. I love that it is such an easy to make and low cost dress up that there was no need to try to keep it looking ‘pristine’.
Of course so much play results in significant wear and tear. It didn’t take long before the headband detached (after another bikee riding with helmet attempt). It’s since been reglued and is now sporting some bulldog clips on each side to give the glue a chance to stay stuck. Meanwhile, almost all of the streamer strands have been trodden on at some point and are either significantly shorter, squished in parts or missing altogether, causing an usual case of premature pattern baldness.
Notwithstanding, JJ still thinks is is beautiful, and continues to play with it over a week later. I’m not sure how much longer it will last, but either way, we’ve gotten our $3.50 worth. 🙂
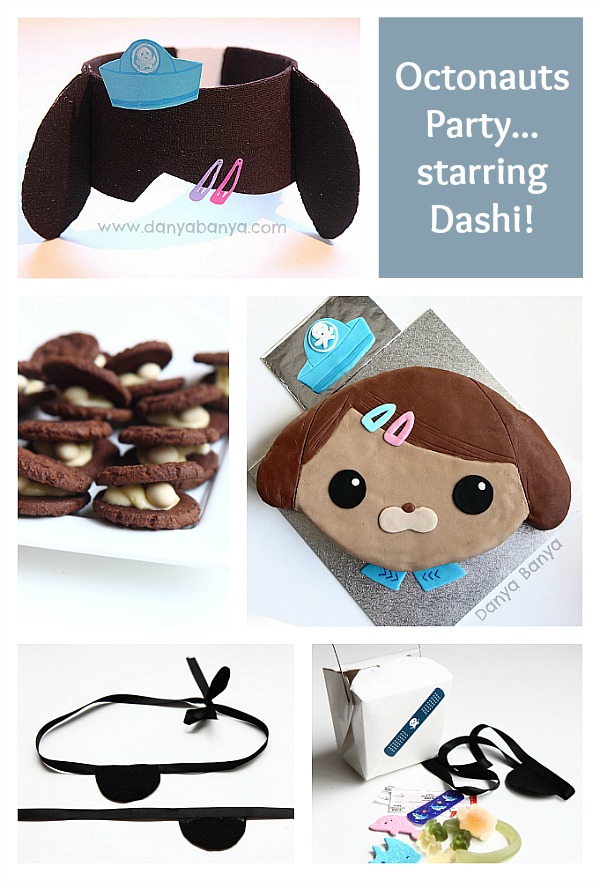
Happy birthday JJ! My sweet little girl turned four this week. She asked for an Octonauts party, starring Dashi of course!
Since most of JJ’s friends attend her preschool, we decided to hold her party at the preschool’s playground after preschool one afternoon. In some respects, this made hosting a party so easy! It meant we were able to save our house from a preschooler avalanche, the playground was perfectly suited for a large group so we could invite her whole class, and all the guests arrived on time! It did also mean however, that I only had 15 minutes of set up time. Makes it slightly tricky! Luckily I was able to put together all of these aspects beforehand, and pull off a pretty awesome Dashi party for my little Octonauts fan. Here’s how we did it:
Dashi Dress Up Costume
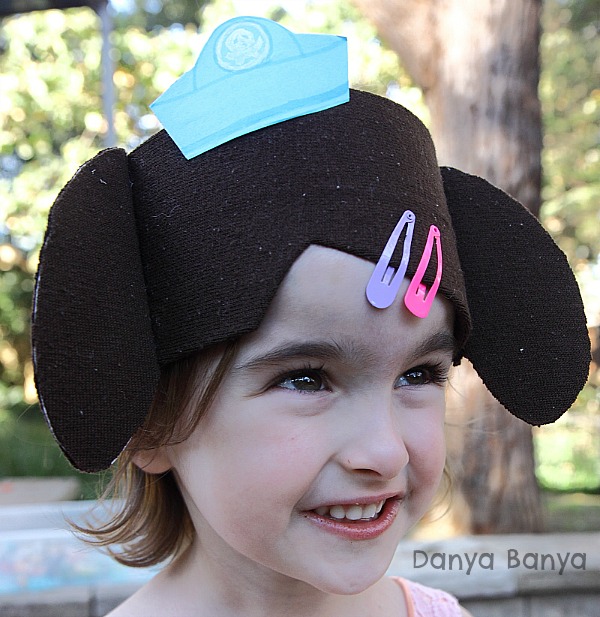
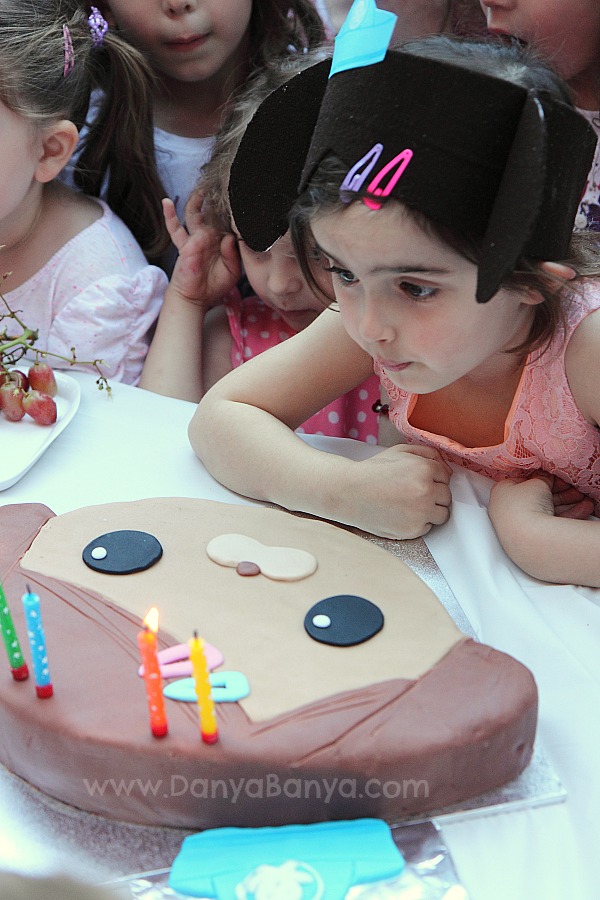
JJ loves dressing up, and so I made this Dashi mask (or would you call it a hat? or a wig?) as a surprise for her to wear at the party. She loved it!
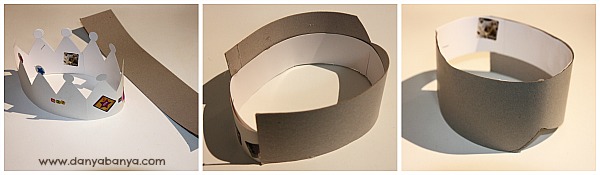
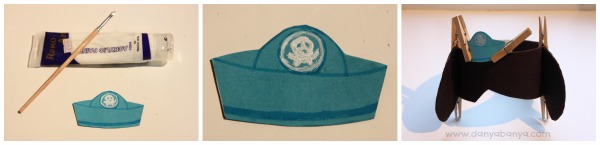
To make it, I used a crown that JJ had decorated and worn earlier that week, so I knew it was the right size. I cut off the spikes and hot glued on some cardboard cut to the shape of Dashi’s fringe.
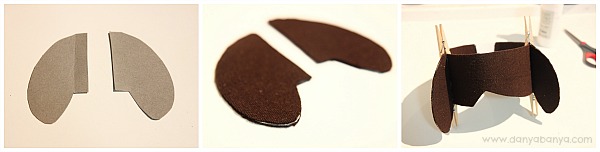
I cut cardboard ears, and covered all the pieces with the material from an old brown cardigan that was in my scrap fabric collection, and glued with PVC glue.
To make the hat, I pasted blue paper to cardboard and added some details with a blue marker and white acrylic paint, and then glued to the top of the hat. Pegs held all the individual elements together overnight until the glue set. Then I added a few hair clips, and JJ’s Dashi mask was ready!
She wore it for the entire party and loved being the centre of attention. And she’s scarcely taken it off since. 🙂
Octonauts Party Food
Second to the birthday girl, the star of any kids birthday party is the cake….
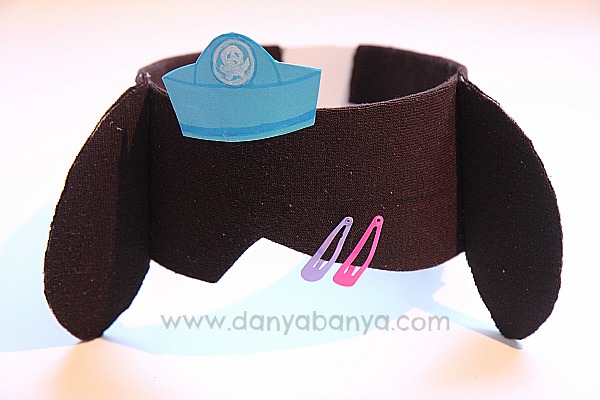
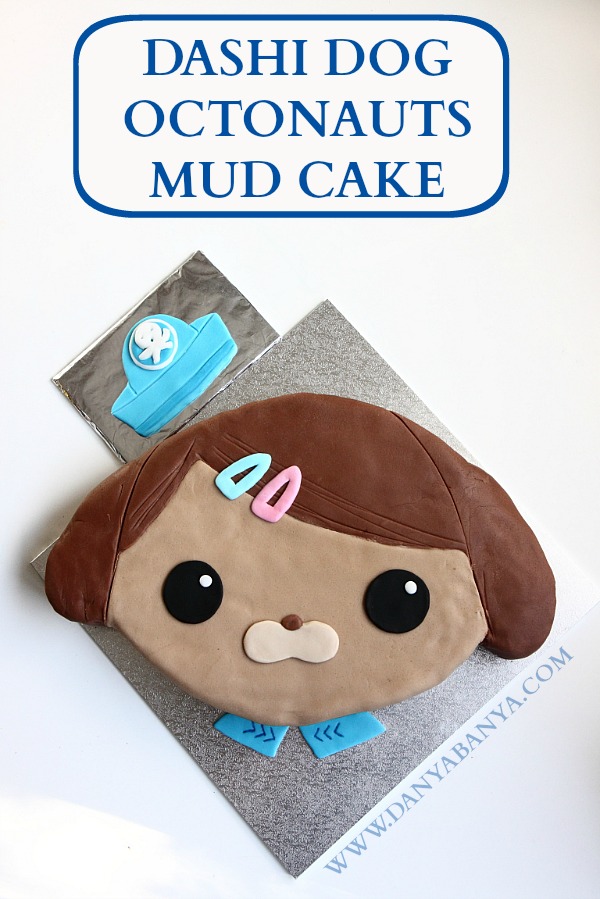
Dashi Mud Cake
I started baking a fortnight before the party and my initial two chocolate cakes failed miserably. I then switched to this large chocolate mud cake recipe and it worked! I used a large roasting tray, and froze the resulting rectangular mud cake for about a week, defrosting it the day before the party.
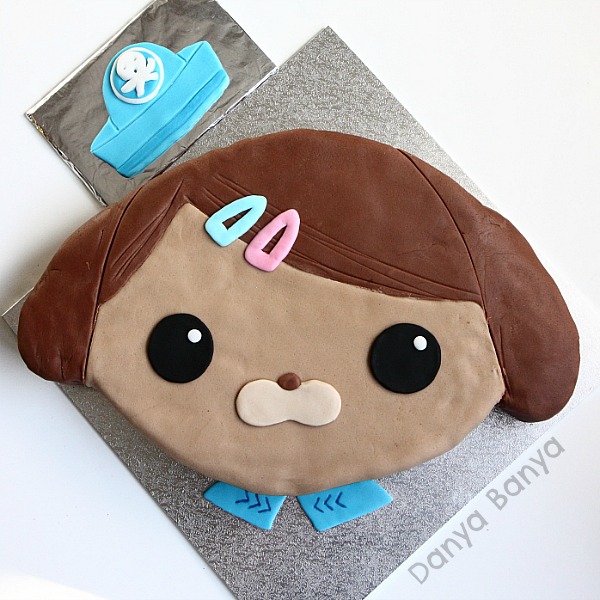
I flipped the cake over so that I could decorate the firm base instead of the crumbly top crust. I cut it to Dashi’s face shape and covered with a dark chocolate ganache. I then used ready to roll icing to add the decorative details.
I won’t pretend this cake was easy. It took a lot of attention to detail and several hours to decorate. It wasn’t until I had finished decorating her face that I realised I had forgotten one of the elements – her Octonauts hat. As I was already pushing for space on our square cake board, I made a little “cake board extension” using several layers of cardboard wrapped in tape and foil. I tried to balance this aesthetically by adding her blue collar below her face as well.
Despite the hat debacle, I still think this is the best cake I’ve ever made. It was moist, dense, chocolately, not too sweet and easy to shape. I received so many compliments! And, most importantly, the birthday girl thought it was amazeballs. Here she is blowing out the candles (with a little help from her friends).
Other Sea Snacks
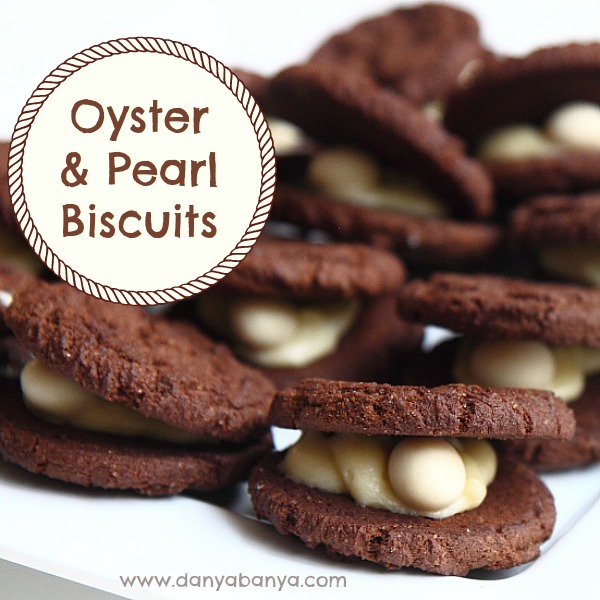
I intentionally didn’t over cater as I was concious that the kids would be going home to dinner shortly. I did put out some mini packets of sea animal biscuits shapes, and these cute little oyster & pearl biscuits that I made using Choc Ripple biscuits, icing and yogurt covered sultanas.
One of my friends also made some gorgeous little Captain Barnacles Gup cars using Tiny Teddy’s, Milky Ways and Smarties. (Thanks so much M! Wish I had gotten a photo!). I also put out some rockmelon & grapes. I provided a few cups in case any of the kids wanted to help themselves to tap water – because after all this is what fish drink. 🙂
Octonauts Party Games
With over thirty kids, we didn’t organise too many structured games. I thought it would be better to have a few Octonauts themed party ‘stations’ that the kids can move between if they wanted to, whilst letting them direct their own play. Here’s what we put out:
Sea Creature Sandpit Toys
The preschool has a large sandpit, so I made sure to bring plenty of buckets and spades. I also included various sea creature moulds and cookie cutters to lend an Octonauts theme to the sandpit play.
Octonauts Colouring In
These Octonauts free printable colouring in activity sheets only took a few minutes to print off. Paired with washable markers and crayons in a quiet corner of the playground, I thought this would make a calming activity for any kids that were overstimulated or needed a time out. On the day I noticed that this area was also used by some of the younger siblings who weren’t quite able to keep up with the ruckus of a preschooler filled playground.
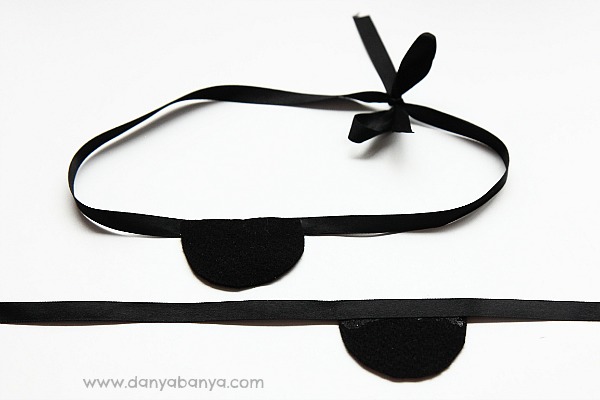
Kwazi Eye Patch Dress Up
These were really easy to make and look quite effective. I just cut semicircles of felt, glued them to strips of black ribbon with PVC glue, and pegged them on the washing line to dry. There’s no need to be too precise with the glue, as the glue dries clear, and you don’t see the back when the kids are wearing them. I made one for each of the party favour / loot bags, and an additional fifteen to act as Kwazi dress up props for the actual party. It was adorable seeing all the little pirates, especially the toddler ones!
I had also intended to also make some cardboard Dashi camera dress up props that they could wear around their necks, with a cellophane eye piece for the kids to look through, but alas I ran out of time….
Sea Creature Sensory Bin
JJ loves sensory play, and I was sure that her preschool friends would too! I simply added pre-soaked water beads and little sea creature figurines to an underbed storage tub, and let the kids explore. Given our 15 minute set up time frame, this was a quick and easy activity to add a bit of themed novelty to the party. This sensory tub had kids flocked around it from the get go. Yes, by the end of the party all the water beads had been squashed, squished, bounced and lost – I take this as proof they were well played with. 🙂
What’s the time Captain Barnacles?
By JJ’s adamant request, a couple of the kids joined in for a game of “What’s the time Captain Barnacles?”, which is an Octonauts twist of the classic game “What’s the time Mr Wolf?” This is such a popular game among the preschoolers at the moment, they love counting the steps, sneaking up, and then squeeling as they run away from Captain Barnacles at dinner time. (I love that it sneaks in a bit of playful maths practice too!)
If you are looking for more easy Octonauts games, you could try “Shark, Shark, Seal!” which is an oceanic twist on the classic game “Duck, Duck, Goose!” I had this game idea up my sleeve in case the party needed jazzing up, but the kids were having so much fun playing together that we let them be.
Peso Medical Bag Party Favours
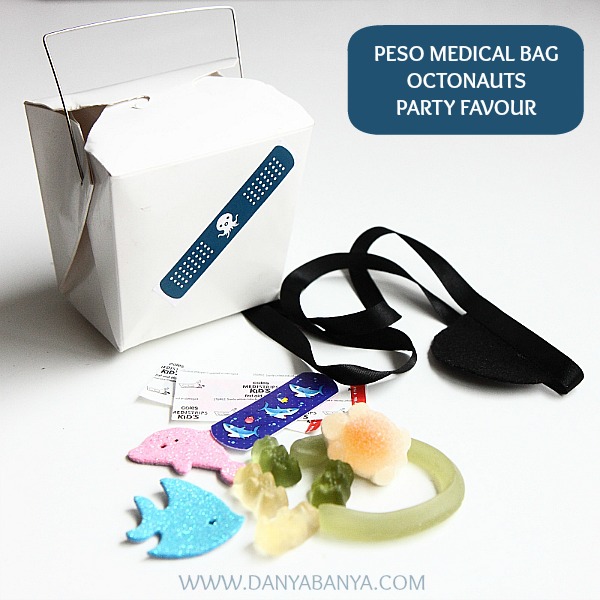
Peso carries his little medical bag with him everywhere, and I thought this would be a super cute party favour / loot bag idea.
If you Google search “Peso Medical Bag party favor” you’ll find lots of different interpretations of this idea. For our version, we used craft noodle boxes, onto which I glued Octonauts bandaid images to the front and back. Inside I put a handmade Kwazi eyepatch, shark & dolphin bandaids, sea creature glitter foam stickers and a few lollies to stop the kids from rioting. (Party favours are commonly called lolly bags in Australia, and Aussie kids expect at least a couple of lollies inside…)
I think our party was, by a four year old’s standard, a huge success. The weather smiled on us with 280C temperatures (outstanding for Sydney in late May), the kids played happily and the parents were free to mingle. We came home to a (relatively) clean house 2 hours later with one exhausted but very happy Dashi Dog. Yay!
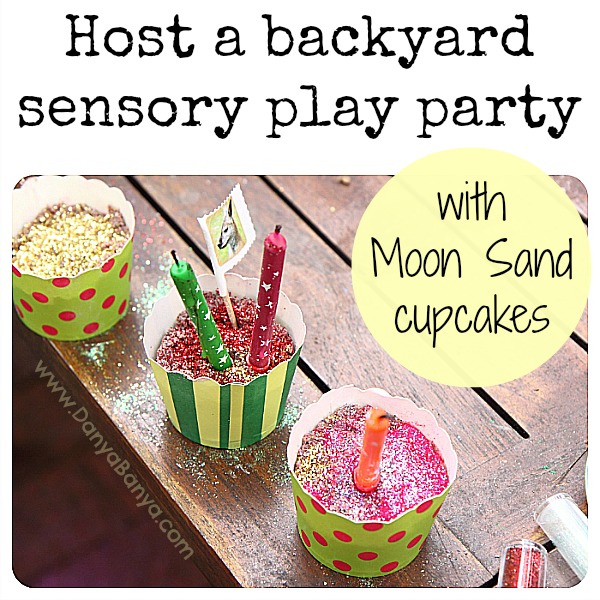
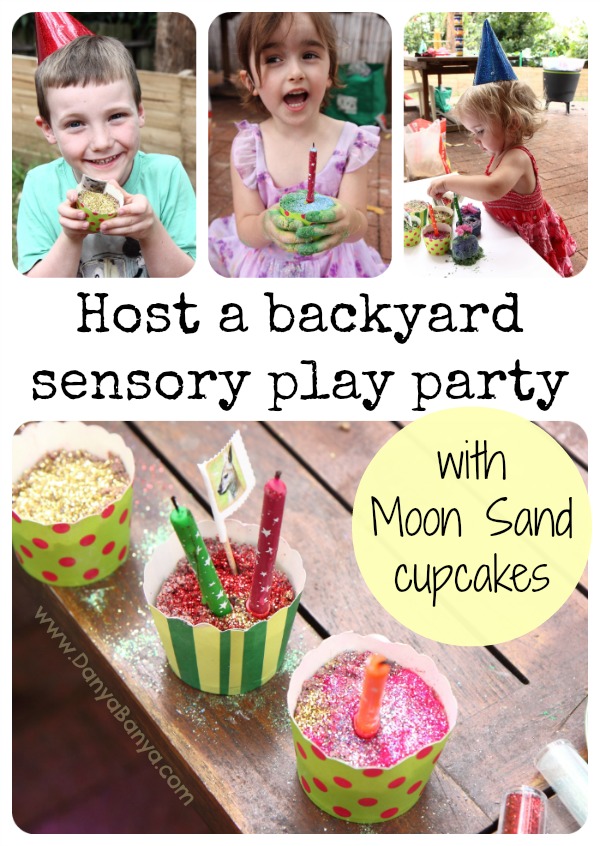
It’s the middle of the month, which means it’s time for another sensory play dough post! Yay! This month is all about Moon Sand. In fact, we decided to throw a Moon Sand party in the backyard…
I can hear a few of you asking – what the sweet heck is moon sand??
Well, it can be one of two things, depending on who you ask. It can either be hydrophobic sand (sand that repels water) or it can be can be a recipe for a type of colourful, glittery, mouldable sand. We gave both versions a go, but I’ll save our (misguided) attempts at hydrophobic sand for another post. Today I want to show you how we made and played with this second colourful, glittery, mouldable version….
First we gathered up a few essential ingredients for this outdoor party play session:
clean sand
cornflour (or corn starch if you live in the US)
powdered tempera paint in various colours
(lots and lots of) glitter in various colours
some large cups and some water
cupcake accessories – cupcake patty pans or liners, paper baking cups, DIY cupcake toppers, a tiered cupcake stand, candles
party supplies – party hats, balloons, streamers
small sweet smelling flowers (to add an additional open-ended and natural sensory element)
a large sensory tub (we use a large plastic under bed storage box)
a bunch of super keen kids ready to play!
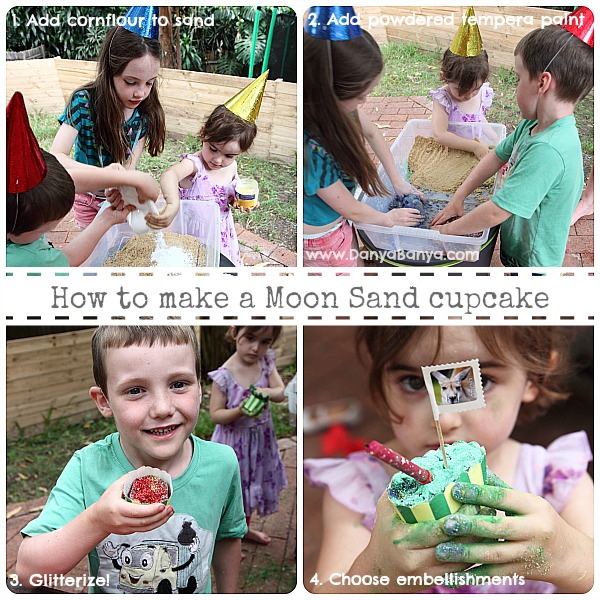
We didn’t measure out ingredients, so I can’t give you an exact “recipe”, but it’s easy enough to wing it as you go. Just add cornflour to damp sand, then mix in some powdered tempera paint until it looks “right”, then add lots and lots and lots of glitter. And then add some more glitter, just to be on the safe side.
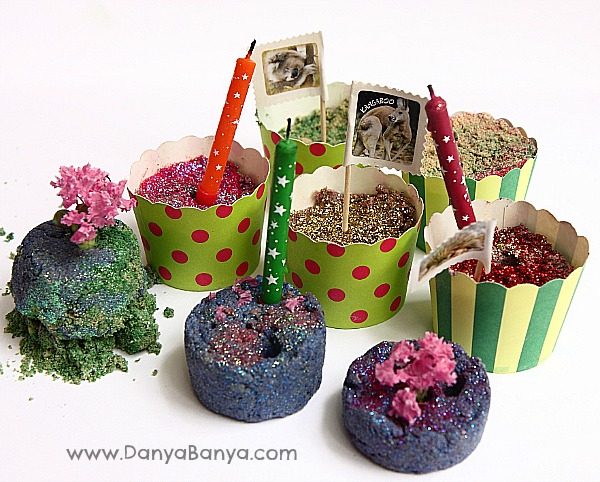
I found the paper baking cups worked better than the cupcake patty pans (or cupcake liners), but it’s not a bad idea to provide both and let your kids decide which ones they’d prefer. They can then add whatever embellishments they like (candles, cupcake toppers, glitter, flowers, etc).
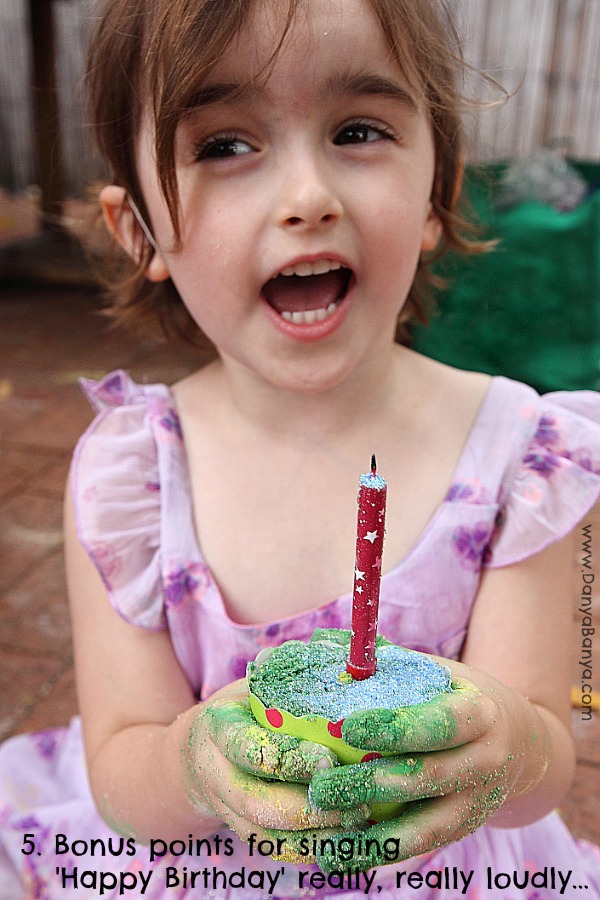
Whichever version you choose, there’s bonus points for singing off key at the top of your lungs.
Another idea is to use the paper baking cups as moulds to make little moon sandcastles. (Actually moon sand sticks together much better than normal sand, so it’s perfect for this sort of thing).
Here’s the assortment of cupcakes that we had at the end of our play session. Pretty!
And one of the best things about this sort of hands-on, no rules, sensory play is that it is fun for kids of various ages. We did this activity with an 8 year old, a 4.5 year old and JJ who was about then about 3.5 years old, and they all had bucket loads of fun together.
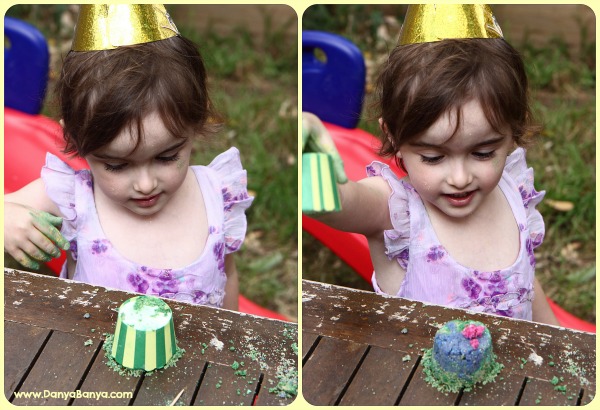
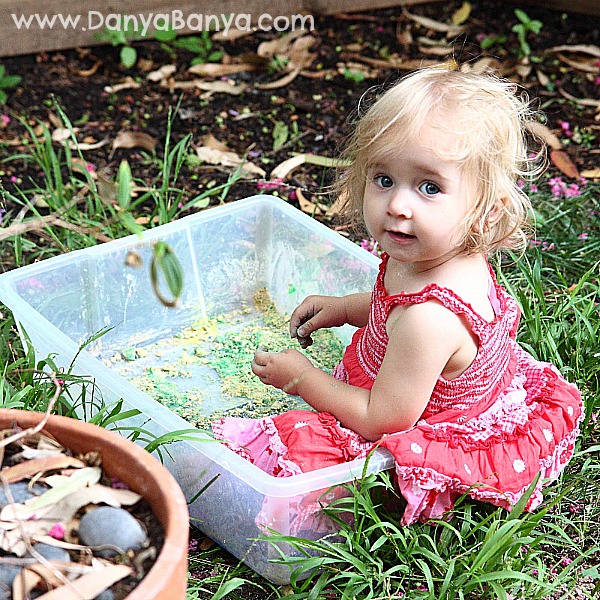
Unfortunately Bee (who was about 18 months old here) was sleeping for most of this play session. But she was super keen once she’d woken up. She had lots of fun admiring and then destroying the cupcake creations, and afterwards she climbed right inside the sensory tub – of course! (I think she’s gotten into this tub every time we’ve played with it so far…)
This is the sort of activity that is perfect for the summer holidays. Open-ended, outdoor, messy play with good friends always seems to do the trick – for my kids anyway.
PS: Did you see the T-Shirt our little friend is wearing? Yes it’s one of the garbage themed t-shirts I made last year. I’m so pleased to see how well it’s held up, considering how much it’s been worn. 🙂
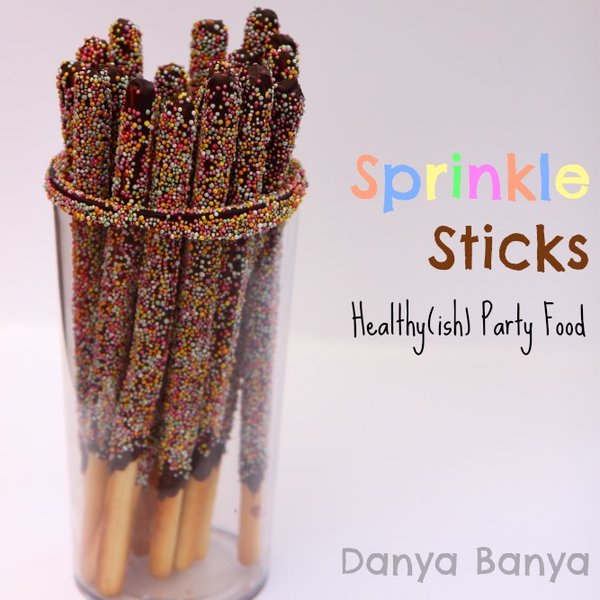
Sprinkle Sticks! Don’t these look so naughty! Well, let me tell you a little secret. They’re actually not as bad as they look. And the kids go wild for them!
Why are they healthy-ish?
Well, firstly they are egg-free, making these a great party food option for those who are allergic to egg (like the eight year old girl whose birthday these were made for).
They have none of the artificial colours that send kids berko. (The no artificial color sprinkles are in more pastel hues than the artificial colour variety. I think they are no less beautiful and the kids certainly don’t notice the difference).
Actually, these sprinkle sticks are completely free of all of these nasty additives, with the exception of palm oil. My issue with palm oil is not so much for health reasons, but rather that the unsustainable harvesting causes havoc for wild orang-utans and tigers in Sumatra. (If you know of a good palm-oil free dark chocolate, please let me know in comments.)
Dark chocolate has all sorts of health benefits. It is much lower in sugar than it’s milkier cousin, and contains loads of soluble fibre, minerals and antioxidants, just to name a few.
And whilst these sprinkle sticks are certainly not sugar-free, they do have enough of the good stuff to make these (in my opinion) a healthier ‘party food’ than what is normally available.
To make them, you’ll need:
Good quality plain grissini (also called breadsticks)
Good quality dark chocolate
Sprinkles (also called ‘hundreds and thousands’) with no artificial colours or flavours
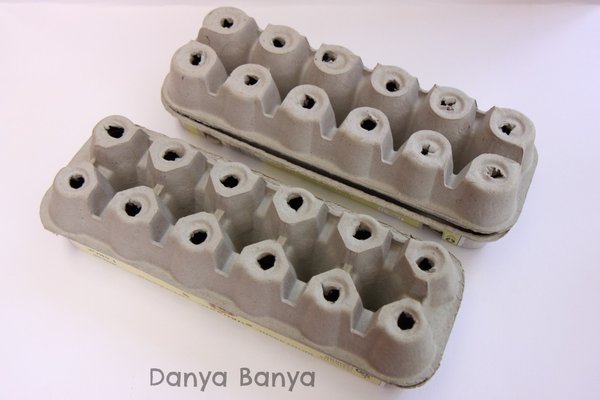
Empty egg cartons
Step 1: Turn your egg cartons upside down, and make little holes along the bottom, like this.
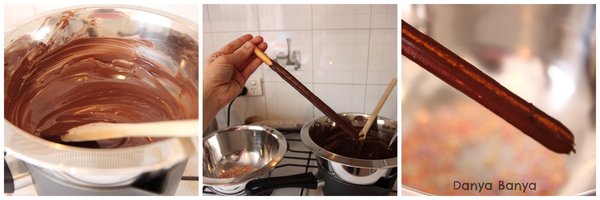
Step 2: Melt the chocolate in a bowl over boiling water. Once melted, scoop the chocolate over the grissini, leaving the bottom 5cm (2 inches) or so clean. Scrape off the chocolate so that you can see the grissini showing through and only just a small amount remains (as per the photo).
Step 3: WAIT. You need to wait for around a minute so that the chocolate can cool enough so that it doesn’t melt the sprinkles. Non-pro tip: don’t wave the stick around trying to get it to cool faster. It won’t, and you’ll end up with tiny drops of chocolate all over your kitchen.
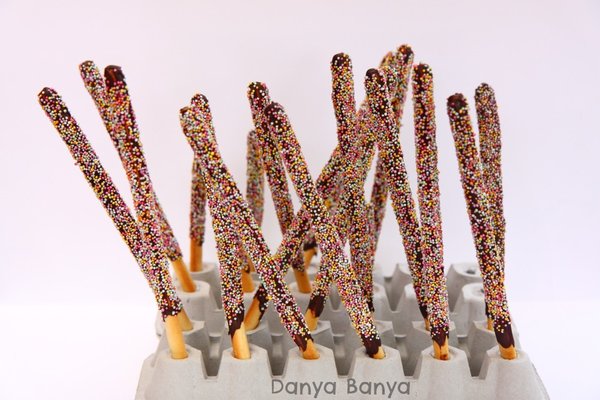
Step 4: Once you’ve waited for the chocolate to cool slightly, you can add the sprinkles by (you guessed it) sprinkling them over the chocolate stick. Have a bowl underneath to catch the sprinkles that don’t stick – you’ll be using these ones again for the next stick. Trouble shooting tip: Are your sprinkles melting into the chocolate? Then you didn’t wait long enough. See Step 3.
Step 5: Stick the fresh sprinkle stick into one of the egg carton holes to set.
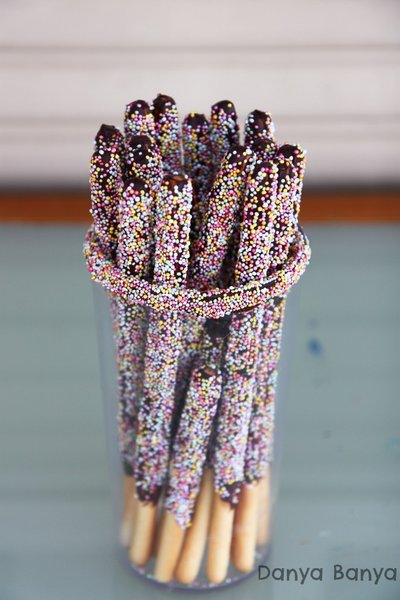
They can set at room temperature, or if you live in a very hot & humid climate, or if you are just in a rush, they can also be set in the fridge for a short period of time.
If you have any left over chocolate and sprinkles, for extra points add a rim to the container that you’ll be displaying them in too. (I got this tip from One Perfect Day’s Chocolate Spoons – which might I add are totally drool-worthy.)
Yum! The ‘handle’ at the bottom makes for less mess (although having a wet cloth handy to wipe faces afterwards is highly recommended.)
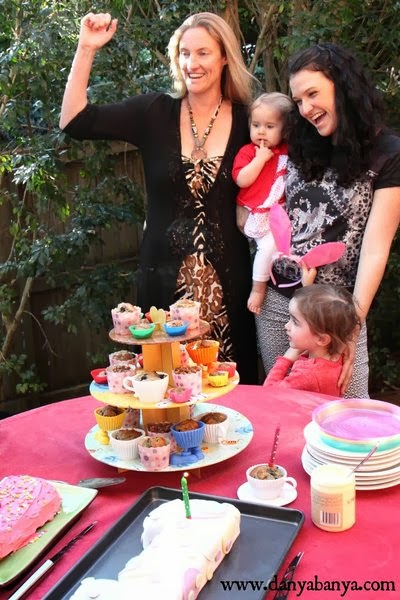
This time it was a joint birthday party for Bee (turning 1), our friend Megan (turning 40!) and myself (turning 36 21).
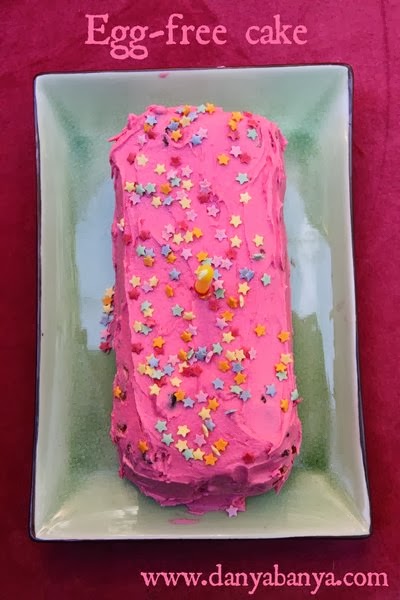
Really this post is just an excuse to share this number one cake that I made for Bee, made with the other half of the batter from her other birthday party.
Here’s how to do it:
I covered the whole lot with white fondant (ready-to-roll) icing and added natural food colours (free from these nasty food colour additives) to the remaining fondant. Then I cut circles in three different diameters and randomly stuck them using a touch of water to act as glue.
Megan also made this cute egg-free cake (from this recipe), as we had a few guests with egg allergies. It tasted like raw cookie dough. Yum!
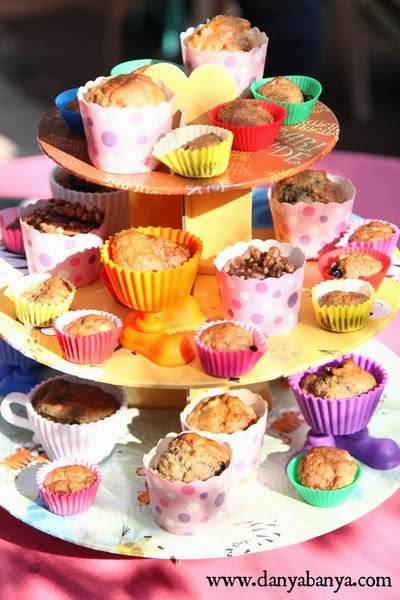
I made some more of my healthy-ish wholemeal banana and blueberry muffins (with no added sugar), and a few of my wholegrain chocolate crackles – recipes below.
Wholemeal Banana & Blueberry Muffins2 overripe bananas mashed (defrosted from frozen is perfect)
1 egg
125mL water
125mL oil (I use an extra light refined olive oil, which has a mild flavour, low smoke point and is liquid at room temperature)
250g wholemeal self-raising flour (or add an extra 2 teaspoons baking powder if using plain flour)
1 teaspoon bicarb soda (also known as baking soda)
1/4 teaspoon baking powder
1 cup blueberries (frozen is fine)
Preheat oven to fan-forced 180 degrees Celsius. Mix banana, egg, water, oil, flour, bicarb soda and baking powder in a large bowl until combined and mostly smooth. Gently fold in the blueberries (if you mix too much you’ll turn the batter blue). Spoon into patty pans, silicon cupcake moulds or greased muffin trays. Bake until the tops are golden and spring back lightly when pressed, which was about 10 minutes for the mini muffins and about 15-20 minutes for the larger muffins. My tip – turn the trays around in the oven at about the half way mark so they cook evenly.
Wholegrain Chocolate Crackles75g of puffed wholegrains and cereals (I use a mix of all-bran cereal and puffed corn, brown rice, millet and kamut)
150g of milk chocolate buttons
100g butter
4 tablespoons golden syrup
Mix wholegrains in a large bowl. Melt chocolate, butter and golden syrup together, and pour over wholegrains. Spoon into paper cupcake cups (the sort that are sturdier than your usual patty pans), and pop in the fridge to set. Yum!!
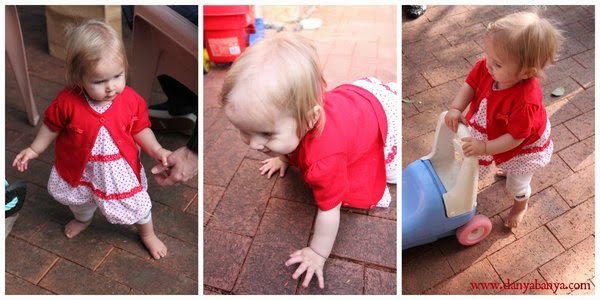
And to finish off I couldn’t resist throwing in a few photos of Bee, who is using a variety of methods to get around these days…
Phew – two birthday parties down, I think we’re almost all birthdayed out!

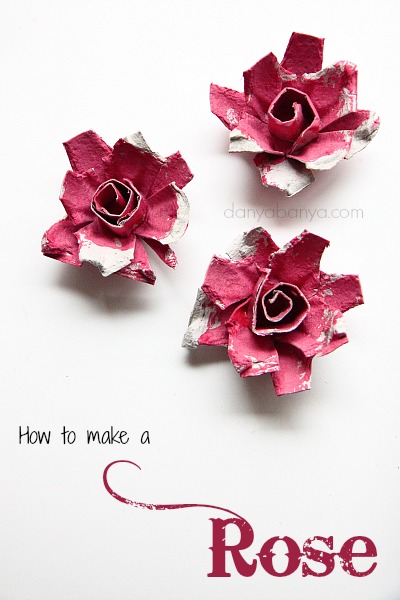
 We’ve made these three so far. (The bottom one was the one that JJ helped with).
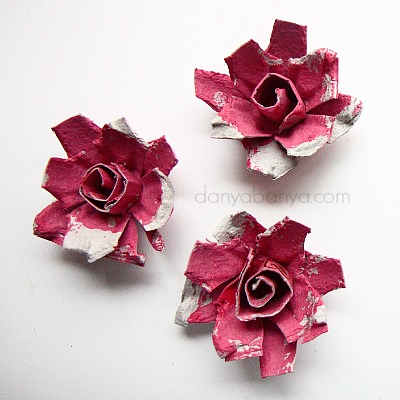


 cake with spotty dotty fondant icing")
 cake")