
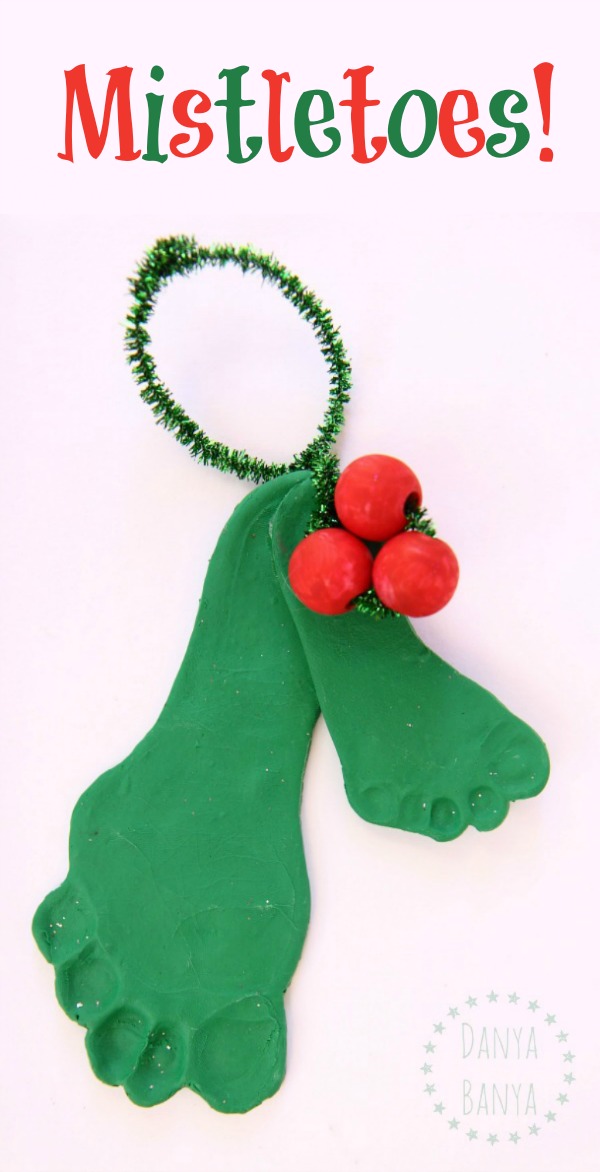
DIY holly & mistletoe! Or should I say mistletoes? Here’s a DIY Christmas craft with baby and toddler footprints that will make your ovaries sing.

I made these DIY holly and mistletoe decorations when JJ was a two and a half year old toddler and Bee was a wee little two month old newborn baby.
I’m so glad that I did, because pulling these ornaments out of the Christmas box year after year, and seeing how little their teeny feet were, has me cluck cluck clucking around the house like a broody chook. (I know JJ’s 2.5 year old feet look large, but trust me, they only look large because Bee’s were so tiny! Both girls’ feet are much bigger now…)
I used green polymer clay (similar to this one) to make the mistletoe footprint ‘leaves’.
My hot tips are: knead the clay really well so that it is nice and malleable; and press down on each toe individually to make sure there’s a good imprint.
Here’s a photo that I took of Bee’s footprints, some of which I’d already traced around with a sharp knife, but hadn’t lifted out yet.

And here are JJ’s footprints on baking paper, ready to go in the oven. As you can see, I’d also cut a little hole in the heel using a straw.

Here’s a close up of the toes. See how you need to press each one?

To add the holly, I upcycled some old beads, which I threaded on to metallic pipe cleaners and painted red. (The pipe cleaners make it easier to paint the beads all the way around.)
After the beads had dried, I used the same pipe cleaners to combine the holly beads to the footprint mistletoe leaves with a few twists here and there.

The glitter effect is a bit of an accidental afterthought. You see, the mistletoes have been stored with the rest of our Christmas decorations, and some of the silver glitter from our baubles has obviously transferred onto the mistletoes, collecting especially inside the toe prints. I haven’t dusted it off as I think it looks good. 🙂


Every year I hang these mistletoes around the house, hoping to catch some people standing underneath for free kisses!
Here they are one year, hung above our kitchen door, next to our Advent Calendar (with some cards missing as we were already a few days into the Christmas countdown by then).

And here is one above the sliding door to our laundry. (And yes that is Little Ted wearing Bee’s old Christmas Onesie on the right – that’s another keepsake we’ve kept from the wee-little-baby days! On the left are a few outfits for our Emo Dolls – Santa and Frosty.)

We usually hang the final holly & mistletoe half way up our stairs, but it’s not such an easy spot to photograph.
I had a little bit of clay left over, so I made this Christmas tree ornament, using a tree cookie cutter and a straw for the hole. Once it was baked and cool, JJ painted it with some purple finger paint, and we used another pipe cleaner to hang it with. It hangs on our Christmas tree every year.

These are becoming part of our Christmas traditions, being brought out year after year!
You can find more Christmas activities for kids here, including:
- DIY baby footprint Rudolph Christmas card
- how to make a cute Christmas tree and holly onesie for babies
- homemade Christmas lights cards, using toddler and preschooler kids fingerprints
- DIY pine cone Christmas tree ornaments that make great kid-made Christmas gifts
And, of course, you can always subscribe to our newsletter to receive lots of fun activities like this sent straight to your Inbox.
xx Danya
* This post contains affiliate link(s). An affiliate link means I may earn advertising / referral fees if you make a purchase through my link, without any extra cost to you. It helps to keep this little blog afloat. Thanks for your support.

#
#
#
#
#
#
About how many sets will each 2oz pack of clay make? Thanks!
#
To be honest I can’t remember how many sets we made from each packet. Sorry.
#
Sorry, I couldn’t find an email for you, so I thought I’d try via the comments. Hello! My name is Maya, and I write for adoption.com. I’m currently working on a slideshow of winter crafts that kids can make to send their birth parents. I would love to include this craft. I would use one of your photos, a brief description of the craft, and include a link to your post. I would NOT include the directions for the craft. Please let me know right away if this is ok. My email is maya.m.zimmerman @ gmail.com. Thank you!
#
Hi Maya,
Thanks for your comment, I’ve sent you an email.
Kindest regards, Danya
#
how long and what temp in the oven?
so cute!!
#
Thanks! Follow the instructions on your polymer clay packet. Ours said 270F (130C), and 15-20 minutes per 1/4″ (6mm) thickness.