There is a special little almost-four-year-old boy in my life.
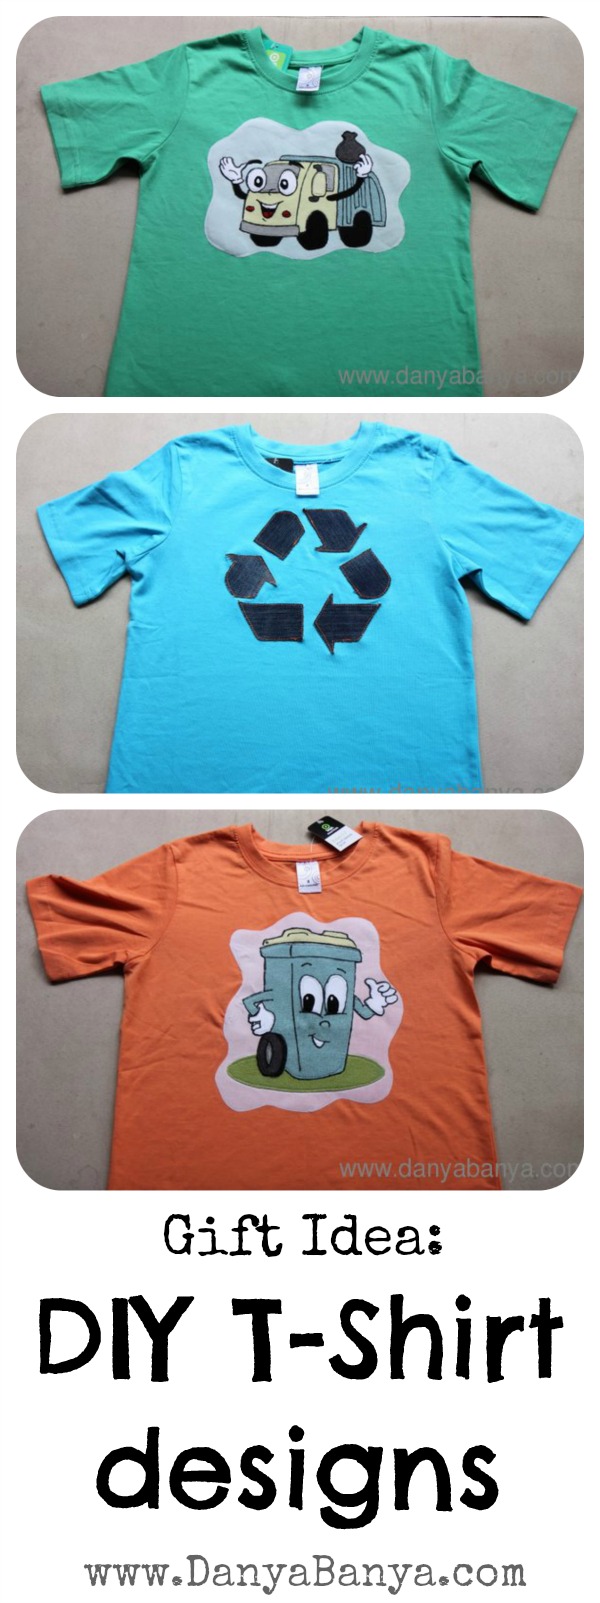
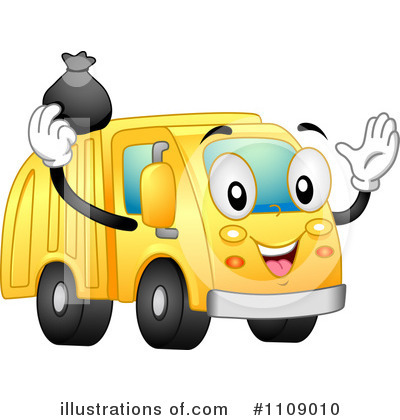
His favourite day is Monday, because that’s garbage collection day. Every Monday, he runs outside four times to wave to the garbage men, point to the garbage bins (in case they don’t know where they are) and lust over the garbage being tipped into the garbage truck / recycling truck / green waste truck, or whatever the case may be.
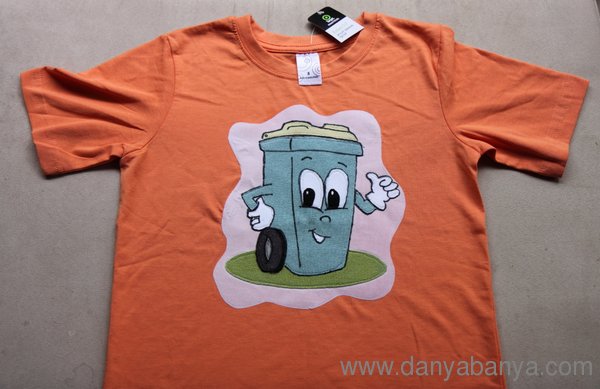
His favourite possession of all time is a wee little garbage bin. But it’s not for rubbish. He puts all his most important treasures inside (including his Trashies collection of course).
And so, when it came time to make him a present, I knew just what this little lad would love….
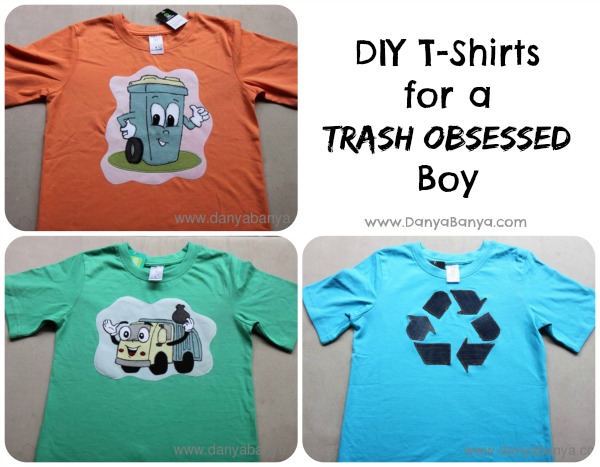
Here’s how I did them.
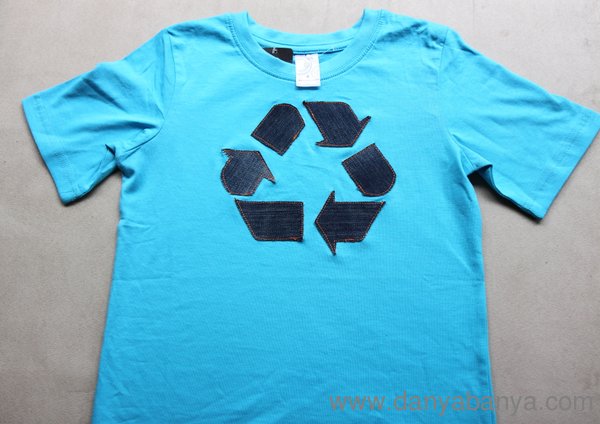
First – I started off with three basic store-bought T’s.
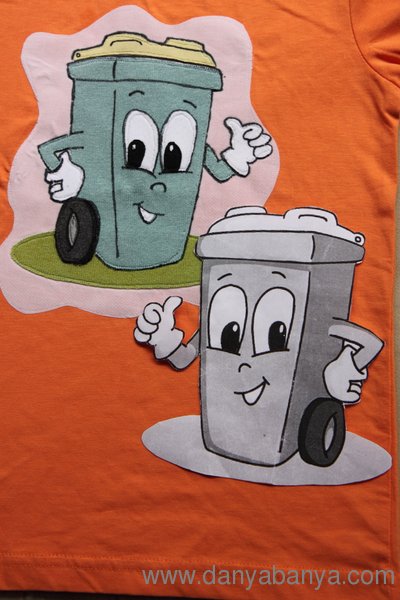
Then I searched for suitable images. And by suitable, obviously they first had to fit the theme. But also, I was looking for cartoon style images with block colours, and as little shading as possible. I knew I wouldn’t be able to replicate shading in my appliqués. I used these ones here, here and here.
Next, I pasted the images into a word document and printed them off. Then I traced each of the parts onto sewable iron-on adhesive.
For the Recycling symbol, I made sure to flip it horizontally in Word to get the reverse of the image, so that it would appear the correct way round on the shirt.
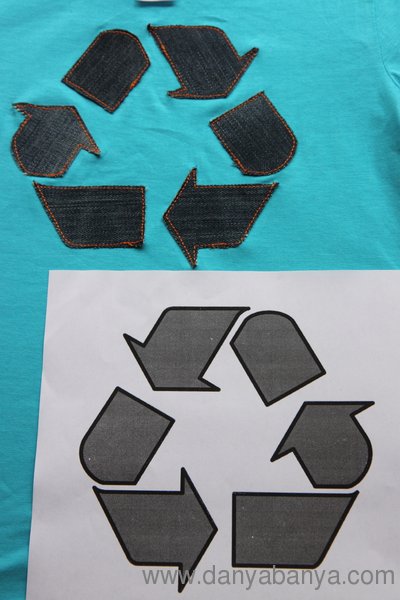
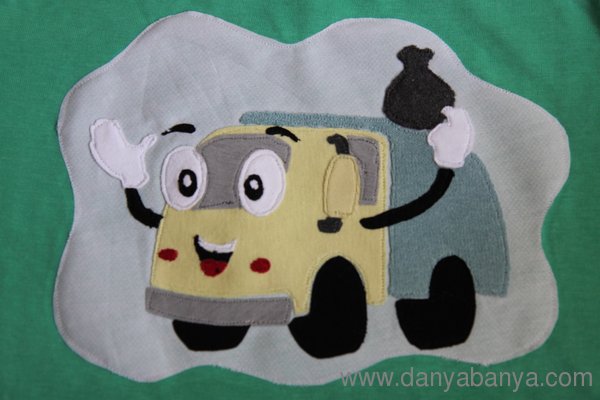
Then I searched though the scrap fabric pile for fabrics in the right colours and textures. And on finding suitable pieces, I ironed on the adhesive, cut them out and ironed them onto the TShirts, and lastly sewed on using coordinating thread for the cartoons and contrasting orange thread for the recycling symbol.
 |
| As you can see, lots of delicious little flaws. |
And as the final touch on the cartoons, I drew over the black outline with a laundry marker.
 |
| Before outlining |
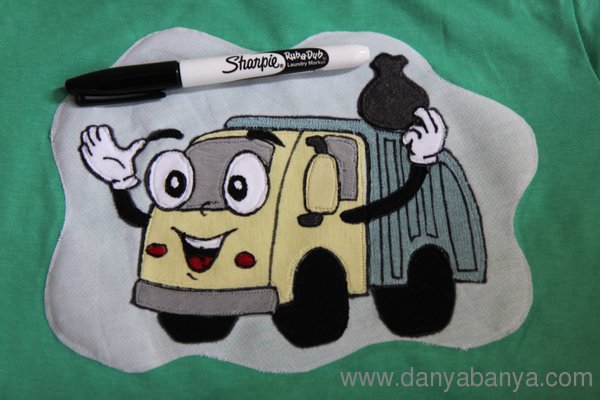 |
| After outlining |
Ta da!!!

I hope my little friend likes them!
xx
Danya


