
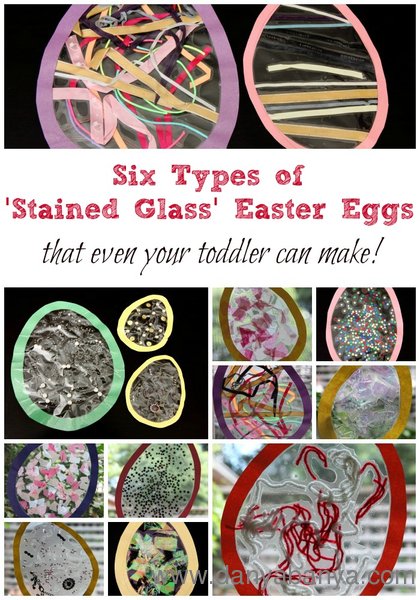
Have you ever made faux stained glass window displays with your children? This is a nice easy craft activity that toddlers can help with.
Here are six types of Stained Glass Easter Eggs we’ve tried this week:
1. Scatters or Confetti
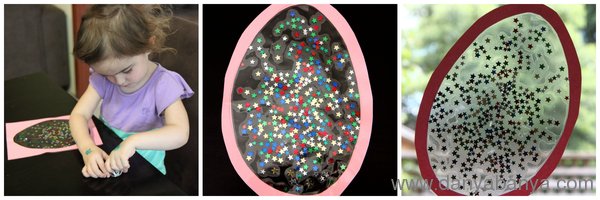
Scatters are shaped confetti – the sort that you scatter on top of the tablecloth at a party. The ones shown above are star shaped, but they come in all sorts of shapes and sizes, and can usually be found at your local bargain shop. The great thing about these is that they are so small and fiddly that picking them up is excellent for developing fine motor skills. Unless, *ahem*, your toddler up-ends the entire container at once.
2. Tissue Paper
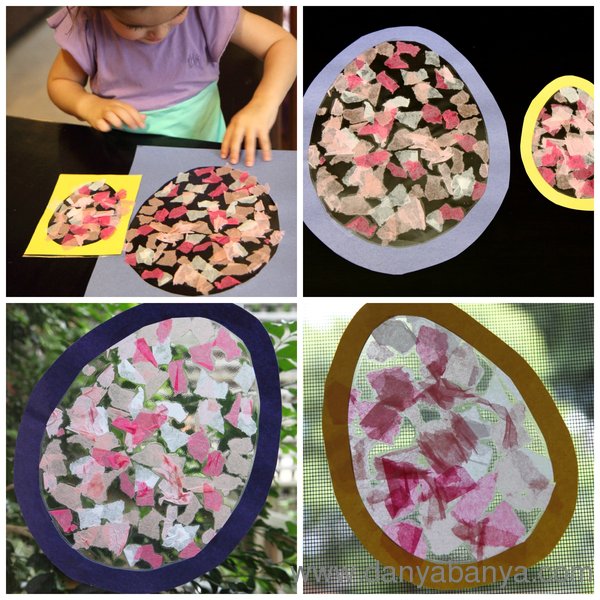
Did you diligently save the lovely tissue paper from past presents? Oh good – so I’m not the only hoarder. Here’s a chance to use some of it up. It looks really good on the windows as some of the light still penetrates.
3. Cellophane
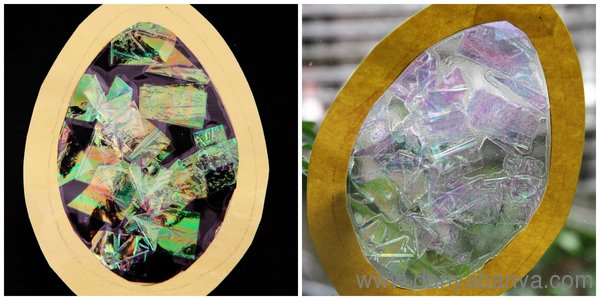
Being both shiny and transparent, this is an awesome medium for window crafts. Please ignore the dodgy pen marks.
4. Ribbons
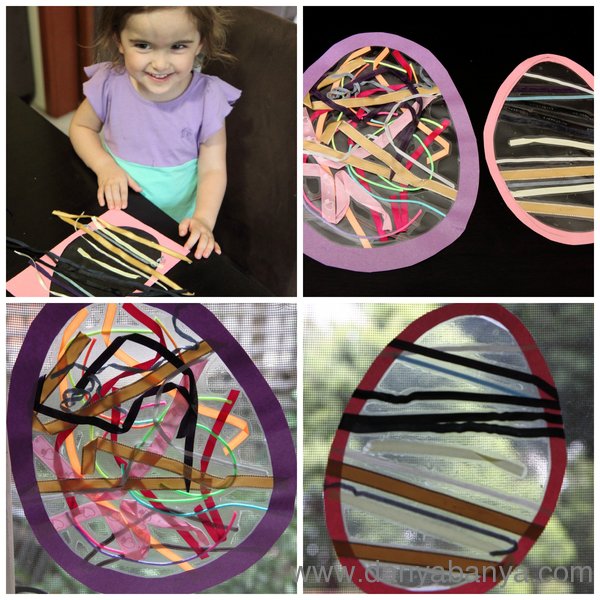
These turned out to be really easy and effective. I just precut the ribbons to size, and showed JJ how to place them in horizontal lines, and she was able to actually do it all herself. It looks really striking on the window.
Then I let her do the squiggly one to help fend off her rebellious streak.
5. Wool
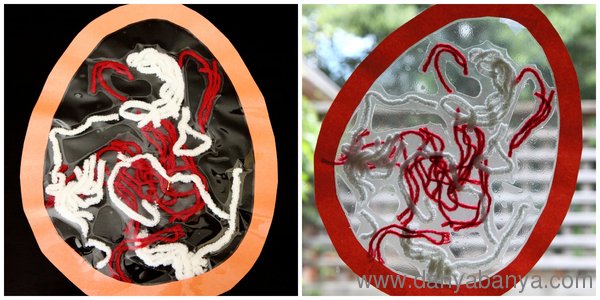
Similar to ribbons, but even squigglier. I pre-cut the wool (or yarn) and asked JJ to put the pieces on one by one. She succeeded, mostly…
6. Jewellery!
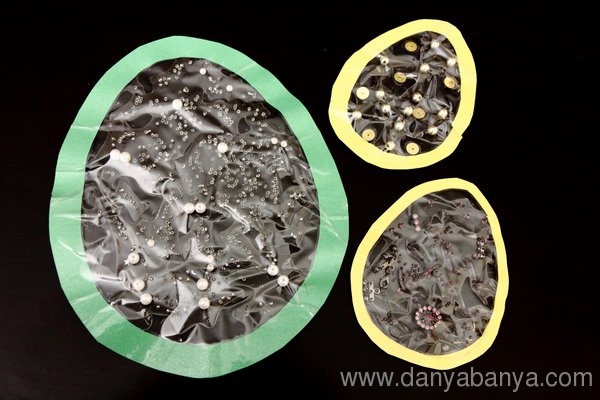
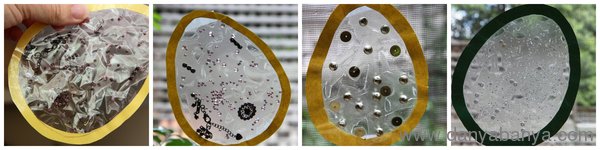
There are three types of jewellery eggs here. The first (large green) one is fake pearls and tiny clear beads. The second (bottom yellow) one is using up the pieces of a broken bracelet. (Both of these were included in a bag of crafting goodness that a friend gave to me a few weeks back. Thanks!) And the third one is using the bibs and bobs from an old and broken hanging mobile.
I can’t wear this sort of jewellery whilst my youngest baby is still pulling on and mouthing anything shiny or dangly, so this stash was at risk of sitting idle. I thought this would be a good way to bring these pieces to life in another form.
Word of warning – this sort of jewellery is a choking hazard. JJ (my eldest, at 2 years and 9 months) is no longer in the mouthing phase, so I was comfortable letting her use these for crafting under supervision. However use your discretion as to whether this would be suitable for your own child.
Would you want to make some ‘stained glass’ eggs too? It’s easy!
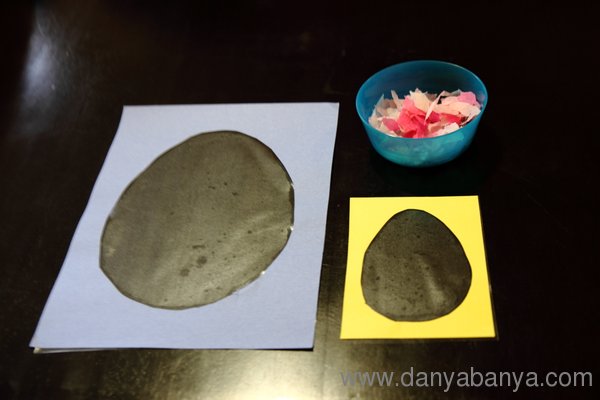
First off, start out with a cut-out. I used Easter Egg shaped cut-outs, partly because it it that time of year, and partly because I already had them from when we decorated paper Easter Eggs earlier this week.
Then roughly cut two pieces of pieces of self adhesive contact paper. The contact paper needs to be at least big enough to cover the hole in the cut-out entirely with about an inch spare on all sides.
Cover one side of the cut-out with a piece contact paper. (In the picture below, I put the white backing loosely back on to protect them until everything was ready.)

Then set out the cut-out, along with some items for sticking, and invite your toddler over to have a play!
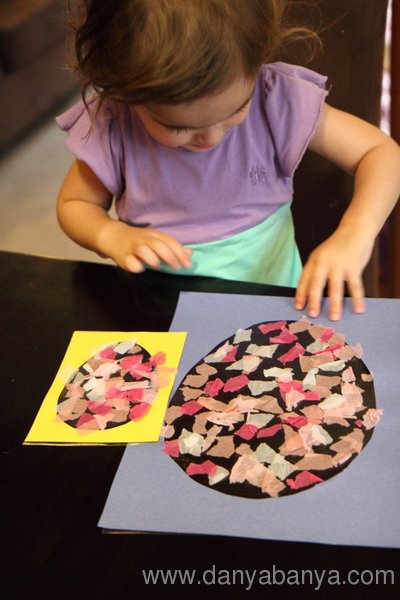
This is really easy even for very young toddlers as there is no glue involved.
Once they’ve declared it’s finished, cover with the other piece of contact paper to seal, and then cut around the edges to tidy it all up a bit.
And then stick it on your window!
Have you made ‘stained glass’ at your place? Share in the comments how you do it. I’ve seen lots of variations using coffee filters and oils. We’re hoping to try them all. 😉
xx Danya
PS: If you want to see how the final window display turned out, tune in to my next post. 🙂